Stitched Form

Project Archive

Revisit completed projects from the first design decision through the final reveal.

July 2026Summer Evening Valet Tray

Summer evenings invite us to slow down. This month's project is a valet tray designed for those quiet moments on the deck. It's the perfect place for your favorite book, your phone, a cool drink, or a few everyday essentials.

Together we'll shape the design through community voting, then build it one step at a time from the first sketches to the finished tray.

1 of 9Design

The goal was to design a valet tray that would make carrying everything needed for an evening outside a little easier. To improve usability, the community voted between built-in handles and a shallow base that would make the tray easier to lift. The winning choice was the shallow base, creating a clean look while making the tray comfortable to pick up.

Community Vote

How should we make the tray easier to lift?

Valet tray design with built-in handlesOption 1 • Built-in Handles
Winning valet tray design with a shallow base✓ Winner • Shallow Base

Watch the Design Process

2 of 9Pattern Fabric

With the design finalized, it was time to choose the patterned fabric that would set the tone for the project. I selected three floral prints from my fabric stash, each with a different personality but all inspired by the beauty of summer. The community voted for their favorite, and the winning fabric became the foundation for the rest of the design.

Community Vote

Which floral print should set the tone for the project?

Bold floral pattern fabric optionOption 1 • Bold
Winning bright floral pattern fabric✓ Winner • Bright
Calming floral pattern fabric optionOption 3 • Calming

Watch the Process of Getting to Three Options

3 of 9Solid Fabric

With the floral fabric selected for the valet tray, the community compared several coordinating solids. Purple was the winning choice, complementing the pattern while capturing the rich blue-violet feeling of a summer evening.

Community Vote

Which solid fabric best complements the patterned fabric?

Teal solid fabric optionOption 1 • Teal
Pink solid fabric optionOption 2 • Pink
Winning purple solid fabric option✓ Winner • Purple

Watch the Solid Fabric Process

4 of 9Cut

Cutting is the moment when the tray starts to take shape. I cut the chipboard first to create the structure, then I cut the lining cardstock for the interior and any supporting layers, and finally I cut the fabrics with enough allowance for wrapping and folding around the edges. Clean, careful cuts make the build and wrap stages much smoother.

Chipboard pieces cut for the valet tray structureCardstock pieces cut for the tray liningFabric pieces cut for wrapping the tray

Watch the Cutting Process

5 of 9Embroidery

I’m embroidering one of the fabric panels cut in the last step to add extra detail, texture, and color. I start by sketching the design on paper, then transfer it onto the fabric with a heat-removable pen. Next, I choose thread colors that coordinate with the fabric and carefully stitch the design, building up the shapes and details as I go.

Finished embroidered flowersFinished embroidered flowers

Watch the Embroidery Process

6 of 9Build

I started by gluing two chipboard pieces together with the grain running in opposite directions to create a stronger, more stable base. Then I attached the walls, checking each corner to keep the tray square, and reinforced the structure with water-activated tape.

Finished valet tray structureFinished valet tray structure

Watch the Build Process

7 of 9Wrap

I’m wrapping the chipboard structure and prepared pieces with the coordinating purple and floral fabrics. The embroidered detail becomes part of the tray’s outer wall, while the patterned fabric brings color to the remaining panels and trim. Careful gluing, smoothing, and folding keeps each surface crisp and the edges neat.

Valet tray structure and panels partially wrapped in purple and floral fabricsEmbroidered tray wall with purple and floral fabric-wrapped pieces

Watch the Wrapping Process

8 of 9Assemble

With every piece wrapped, I’m assembling the tray by attaching the prepared linings and bringing the finished components together. Careful placement keeps the edges aligned, the corners neat, and the final details polished.

Finished floral fabric-covered valet tray viewed at an angleFinished floral fabric-covered valet tray viewed from above

Watch the Assembly Process

9 of 9Reveal

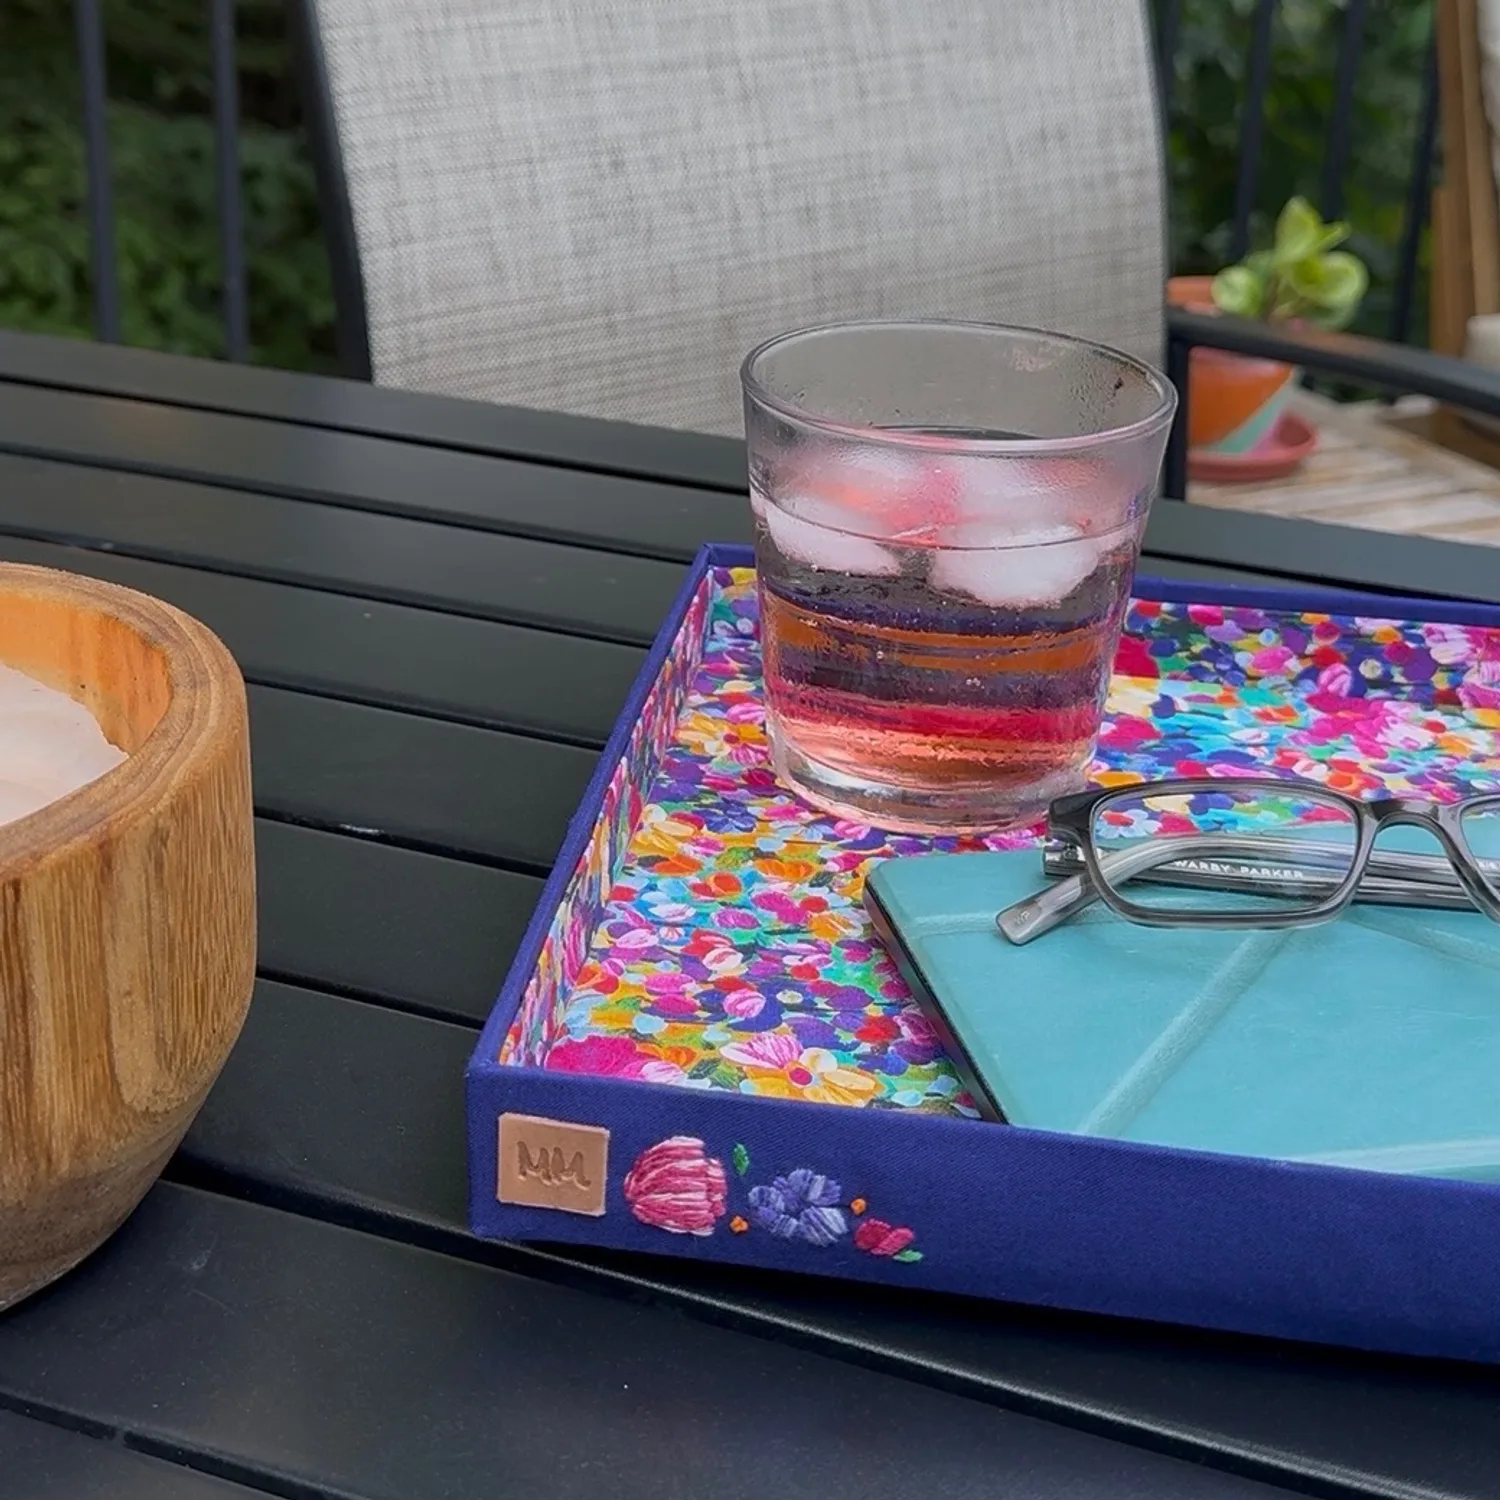
The finished summer evening valet tray is ready to use. The floral interior, deep purple exterior, and embroidered detail come together in a colorful tray designed for carrying a drink, a book, and everyday essentials outside.

Finished floral valet tray holding a drink, glasses, and a tablet outdoorsFinished summer evening valet tray styled for outdoor useFinished fabric-covered valet tray with floral and embroidered details

Watch the Final Reveal

Project Recap

Revisit the complete Summer Evening Valet Tray build, from the first pieces to the finished project.

Watch the Project Recap